Overstream.Studio is a desktop application for managing widgets that are placed on top of the video stream to add additional information and dynamics to the video stream. The streaming software must support the ability to add a browser window on top of the stream.
Overstream.Studio is designed primarily for sports broadcasts and allows you to manage lists of team players and individual participants. Widgets can display information about a team's score, a current participant, a list of participants and more. The widgets are constantly updated and available within the application.
The application is only available for Windows versions 7 and above. Run the installer and the application will install automatically.
The application contains several logical parts
Includes adding and editing teams, players, individual competitors, groups of competitors, statistical categories. More how to create teams, players and other data you can find here
Control the visual details of widgets: colours, fonts, shadows, etc. More how to manage widgets and bundles you can find here
To manage data, you need to create events, such as a regular stream, a match, or an individual competition, for example. Each type of event has a control panel that you can use to manage the flow of data to all of your widgets. Some widgets also have their own control panels. More how to manage events you can find here

Fig 1. How the parts of the application are related to each other
All widgets are divided into 3 groups:
More detailed documentation how to use all parts of the application you can find from the following links:
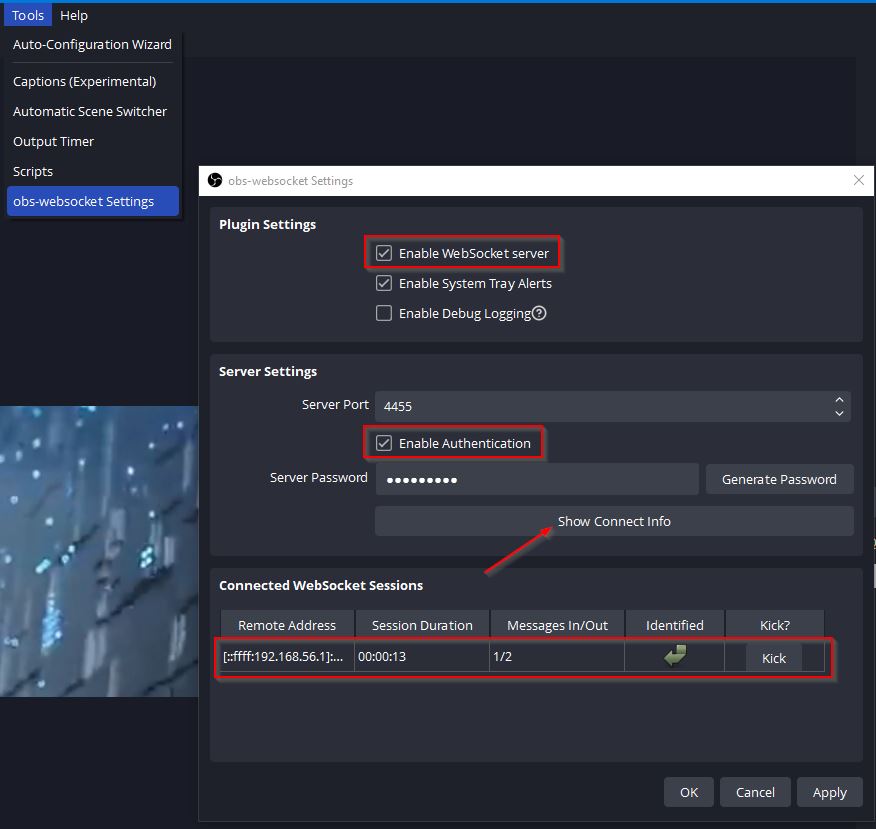
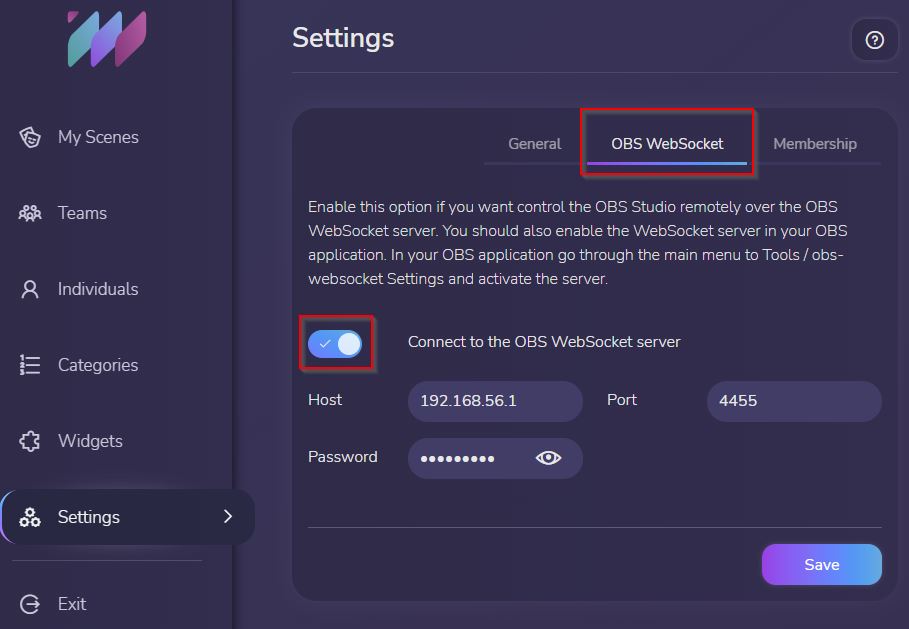
The OBS Studio gives you the ability to connect and manage it remotely. To do this, you need to enable the websocket server there. Find this option in the Tools/WebSocket Server Settings menu and activate the server. Also enable an authentication. By clicking the "Show connect info" button, you can view the connection parameters and enter them into the application settings on the Settings/OBS WebSocket page, as shown in the pictures below.
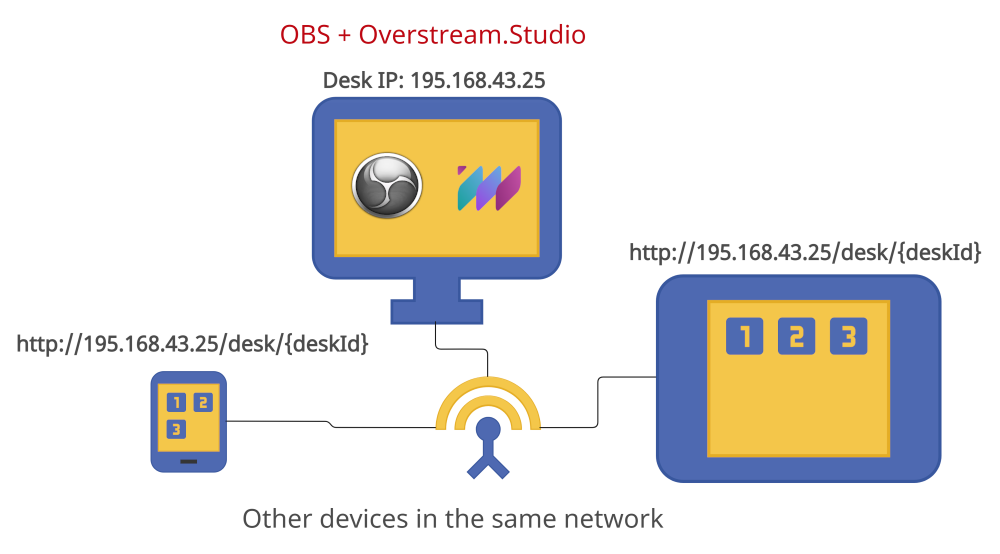
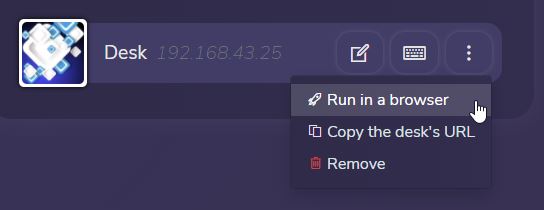
A Desk is a web page with a set of buttons for quick access to various functions of the application, such as
A Desk can be accessed via a web browser from any device on the same network as the computer running the application. When creating a Desk, you must select its IP address where it will be accessible on the network. You will be offered several IP addresses to choose from. Try different options and see if the Desk can be reached at this address from another device on the network. Creating a Desk is simple. Enter a name and select the IP address where the Desk will be accessible on the private network.
Then go to the button editing page. You can create 5 types of buttons, namely
Each button can have its own colour, icon, title, image, and you can change the order of the buttons.
Once the buttons are created, try opening the Desk in your local browser. You should see a page at address http://{IP of the desk you have chosen}:8082/desk/{Desk ID}. If you have selected the localhost as the Desk's IP, the Desk will only be accessible from the same computer where is running the application.
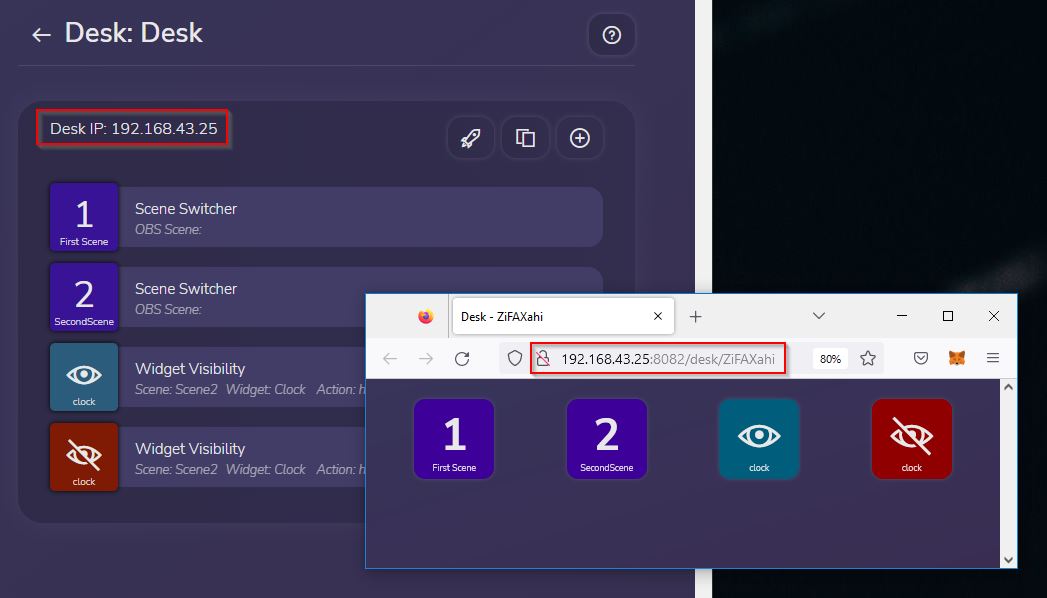
In the free version, you can only create one Desk and three buttons.
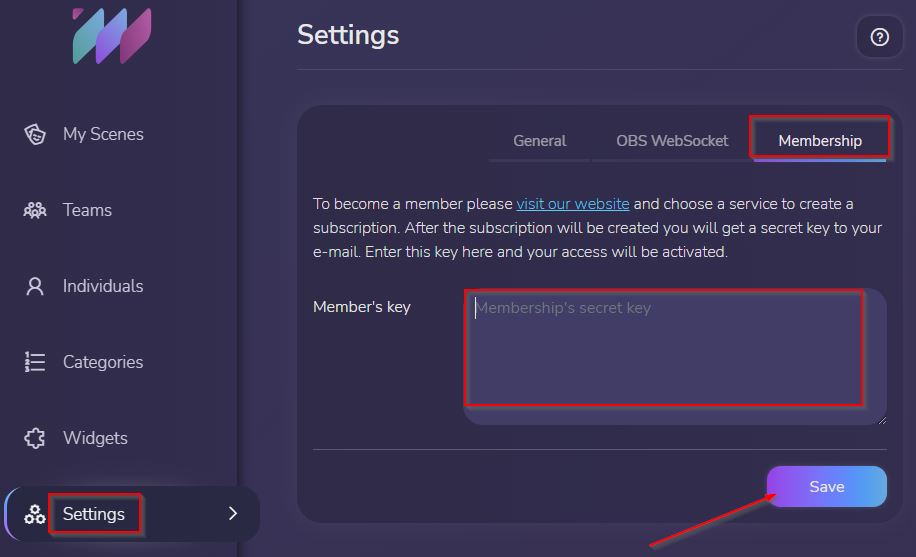
Why should you become a member? If you like widgets and you use the program regularly, you can support us by subscribing on a monthly basis. Some widgets are not free, but you get full access to all widgets and priority support.
We currently use the Patreon service to manage subscriptions. Go to our Patreon page and click on the 'Join' button. The service will ask you to sign up and make a purchase. After that you will receive a secret token in your email. Enter it into the Overstream.Studio application and your full access will be activated.